Are you worrying about your RV water tank’s foul smell or bad taste? Then, sanitizing an RV fresh water tank should be the next thing on your mind.
Learning how to sanitize an RV fresh water tank should be one of the best skills every RVer should have. When you sanitize your fresh water tank, you can always have a fresh water supply in your RV.
Water is life, and you would certainly agree that life in an RV is not always enjoyable without a clean water supply, especially if you’re a full-timer. Worry no more; this piece will walk you through sanitizing your RV fresh water tank system with an easy step-by-step guide.
Table of Contents
- 1 Why you should sanitize your RV fresh water tank
- 2 How often should you sanitize an RV water tank?
- 3 Things you need to sanitize your RV fresh water tank
- 4 How to sanitize RV water tank with bleach
- 5 Is it OK to run bleach through the RV water heater?
- 6 How much bleach is needed to sanitize an RV water tank?
- 7 How long should I leave bleach in the RV water tank?
- 8 Can I use vinegar to sanitize my RV water tank?
- 9 Should you sanitize the RV hot water heater?
- 10 Best RV Fresh Water Tank Sanitizer
- 11 Conclusion
Why you should sanitize your RV fresh water tank
The RV fresh water tank is usually filled anytime you go on an RV trip. Occasionally, the water you have already used may not be clean anymore. In addition, the water is likely to develop some bacteria, mildew, and mold when you leave the water in the tank and water lines for an extended time.
When this happens, RV water treatment will be needed, and this calls for sanitizing your RV water tanks and sterilizing the RV water system. By doing so, you’ll eliminate all the bacteria, mildew, and mold that are growing in the water tank/lines.
How often should you sanitize an RV water tank?
If you regularly use your RV, you should sanitize the water tank once every six months. Although we usually sanitize our RV water lines during the spring in preparation for camping trips, this ensures no build-up of algae and bacteria, which is most likely to occur when you haven’t sanitized your RV water tank for long.
Regardless, if you do not often use your RV, you should sanitize your fresh water tank as soon as you remove the RV from storage. Water contamination also calls for sanitizing your fresh water tank.
It’s improper to leave water unused in an RV water tank for at least two weeks, but if that happens, you should sanitize the water tank. Also, remember that the water tank on a newly purchased RV (brand new and used) should be adequately sanitized, too.
Things you need to sanitize your RV fresh water tank
Sanitizing your fresh water tank is not rocket science. You only need simple supplies that you can conveniently purchase at a physical store or online.
You’ll need the following:
- Bleach (regular bleach will suffice)
- Clean water
- A funnel
- A measuring cup
- Compact holding tank
- Water hose
Once these supplies are ready, follow the steps below to sanitize your RV water tank with bleach.
How to sanitize RV water tank with bleach
First, you will need to park your RV near a drainage system or soil. This will allow the water that drains out after you sanitize your fresh water tank to flow down the drain or be absorbed into the ground.
With that said, carefully follow these steps to sanitize your RV fresh water tank:
Step 1: Switch Off the Water Pump and Heater
Before you sanitize your freshwater tank, switch off the water pump and water heater before you drain the hot water tank. Ensure that you run your hot water for roughly two minutes or until you are out of hot water.
After that, allow the tank to cool off.
Next, open the pressure valve and the anode rod to drain the water heater tank; this is also the right time to inspect the anode rod to see if it needs replacement.
Now open all the faucets to let air out while the water tank drains.
Note: You should always turn off the water heater and pump before you empty your RV water tank. Failure to do so can result in water tank damage.
Step 2: Empty the Water Tank
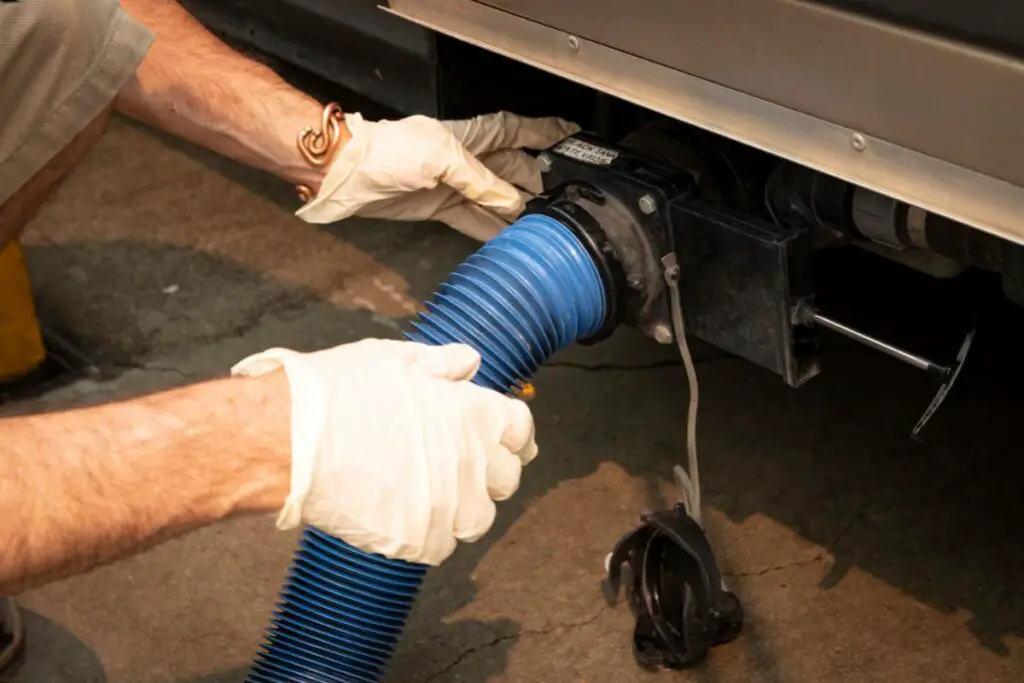
Locate the water tank drain valve under your RV. Open the drains and allow the tank and water lines to empty. You’ll also need to empty your gray water tank as well.
Some manufacturers add two separate low-point drains—one for cold water and the other for hot water. It is best to check your RV owner’s manual to get information on the location of the drains.
Step 3: Pour the Diluted Bleach Solution and Clean Water Into the Water Tank
With the help of a funnel, pour the bleach solution into the water tank. Next, fill up the water tank with clean water. Consider using a water hose, which is more convenient than a funnel.
Close the water tank inlet after you fill it up. The aim is to ensure the clean water mixes with the bleach solution inside the tank.
Step 4: Switch On the Water Pump
Now, you can switch on the water pump to allow the bleach and water solution to move through and sanitize the RV water lines. As the water pump does it works, open the faucets and showerheads for 2-3 minutes.
This will guarantee that the bleach and water solution reaches the nooks and crannies of your RV water lines.
Shut off the faucets and shower heads once the bleach solution has been appropriately disseminated. Now, switch off the water pump.
Step 5: Empty the Tank and Water Lines
Wait between 12 to 24 hours and empty the water tank system. It is safer and environmentally friendly to empty the bleach solution straight into a sewer inlet.
If no sewer inlet is nearby, you can empty the bleach solution into a compact RV holding tank. You can place the holding tank under the RV drain outlet, and after you collect the bleach solution, properly discard it into a sewer.
You can also run the bleach solution into the gray water tank. To do this, switch on the water pump, open the faucets and showerheads, and allow the bleach solution to run into the gray water tank.
However, ensure the gray water tank is connected to a sewer inlet for proper disposal. Do not let the bleach solution stay too long in the gray water tank, as it can damage the rubber tank.
If you don’t want to leave a trace of bleach solution behind, open the valves as soon as you turn off the water pump. Alternatively, you can open the valves on the water tank and let the bleach and water solution drain into a sewer outlet.
Step 6: Flush the Water Tank and Water Line
Once the bleach solution is completely drained from the system, fill up the tank with clean water. Switch on the water pump once more to allow the clean water to disseminate throughout the water lines.
The goal is to ensure you get rid of all traces of bleach. As the water pump runs, turn on the faucets and showerheads to allow the water lines system to lose the smell of bleach.
You can repeat this process more than once until you’ve successfully eliminated the bleach smell. This will be an excellent time to replace the water filters in your RV (if you have water filters).
Typically, a new water filter can serve you for up to a year before you can decide to replace it. However, always inspect your RV water filters to determine when to replace them.
Finally, you are done with sanitizing your fresh water tank. However, if you don’t plan to use your RV, it is best to leave the water tank empty until you are ready to use the RV for a trip.
Is it OK to run bleach through the RV water heater?
Yes, but you may need to run a mild bleach solution through the RV water heater. You can use the recommended measurement (2 ounces of bleach for every 16 gallons) for the ideal bleach solution.
Using more bleach can leave a trace amount of bleach that can oxidize the aluminum lining in your RV water heater. Ensure you properly flush your RV water heater with fresh water–flush until you can no longer perceive the bleach.
Remember to switch off your RV water heater before attempting to sanitize it. Don’t add bleach to hot water when sanitizing your RV water heater. Hot water renders bleach useless.
How much bleach is needed to sanitize an RV water tank?
Now is the time to measure the bleach you need to sanitize the RV water tank system. You’ll need 2 ounces of bleach for every 16 gallons of water to sanitize your RV tank.
You may need to use a calculator to determine the adequate ounces of bleach you require, as the size of RV water tanks vary. Avoid using excess bleach, as it is not safe for your health.
Also, try not to inhale the bleach to avoid health complications. Additionally, adding the bleach directly into the water tank is unsafe. Dilute the bleach with clean water using the measurement mentioned above. Use the measuring cup to get the correct measurement.
How long should I leave bleach in the RV water tank?
It is best to leave the bleach solution for 12 to 24 hours. Leaving it this long ensures the RV fresh water tank and the water lines are properly sanitized.
Sanitization takes time, so leave the bleach solution overnight to sanitize the water tank properly. However, you should never let the bleach solution stay for over 24 hours.
Also, leave a small bleach solution in your gray water tank, but ensure it does not exceed 24 hours. Take your time when sanitizing your RV’s fresh water tank, as the process requires time and patience.
Can I use vinegar to sanitize my RV water tank?
Yes, you can sanitize RV fresh water tank with vinegar. However, you need to heat the vinegar to 130 degrees Fahrenheit. To make the vinegar effective in getting rid of harmful bacteria.
Use a 50/50 measurement—one gallon of vinegar per gallon of warm water. You need warm water because it helps get rid of water spots. Ensure the warm water is clean.
Leave the vinegar and water solution to sit in your RV fresh water tank system for 8 hours (minimum). You may also leave it overnight but not more than 24 hours. Ensure you thoroughly flush the fresh water tank system after waiting.
This method is mostly for RVers who are uncomfortable with the bleach method. So, if you want to learn how to sanitize RV fresh water tank without bleach, then try out this method for a fresh water tank RV.
Should you sanitize the RV hot water heater?
You can sanitize your RV water heater (along with your fresh water tank) because your RV water heater can house bacteria that can withstand hot places.
Additionally, you need to sanitize and flush your RV water heater to get rid of sediments that may be present in it. Sediment build-up can increase over time, and this may cause clogging in the water heater valves.
So, always sanitize and flush your RV water heater to prevent clogging that may damage your RV water heater. As always, ensure your RV water heater is switched off and cool before you sanitize it.
Best RV Fresh Water Tank Sanitizer
There are several RV water tank sanitizers in the market. You can choose from some of the best sanitizers available to you.
1. Thetford Fresh Water Tank Sanitizer
Thetford Fresh Water Tank Sanitizer is a good option. This non-bleach RV water tank sanitizer kills 99% of bacteria. The product is easy to use.
2. Camco TastePURE Spring Fresh Water System Cleaner and Deodorizer
Another good product for sanitizing your fresh water tank is Camco TastePURE Spring Fresh Water System Cleaner and Deodorizer. It is safe to use, and you do not need any elaborate preparation to use the product. It is also biodegradable and safe for use in RVs.
3. Aqua Shock Fresh Water Tank Sanitizer/Disinfectant
Aqua Shock Fresh Water Tank Sanitizer/Disinfectant is an antimicrobial product that cleans and disinfects. One ounce added to 30 gallons of clean water can sanitize your RV’s fresh water tank. It is EPA-approved and does not chlorinate. It also acts against built-up biofilm in your water tank and ensures the water lines are sludge-free.
4. Camco TST Camper/RV Grey Water Odor Control
Camco TST Camper / RV Grey Water Odor Control is a liquid and lemon-scented cleaning agent that removes odor and grease buildup in your drains and gray water tank. It is biodegradable. You only need four ounces to clean a 40-gallon tank.
5. Thetford AquaMAX
Thetford AquaMAX is a fast-acting, safe, and effective formula for unclogging RV holding tanks. The product is free of formaldehyde and bronopol. The fragrant, fresh spring scent removes any odor from the holding tank.
Ensure you only sanitize your fresh water tank with sanitizers approved by your RV manufacturers. Read the instructions before using the sanitizer to avoid damaging the RV freshwater tank system.
Conclusion
Ultimately, you don’t need certification to sanitize your RV water lines. Just use the proper measurements for bleach and clean water solution and other precautions you need to take when sanitizing your RV fresh water tank.
You can easily sanitize your RV fresh water tank and eliminate any contamination that can cause odor or bad taste from your water tank. Now, you can enjoy your camping without worrying about fresh water. For the best fresh water sanitizer, select from the above-listed RV water tank sanitizers.
