As the cold winter months approach, it becomes crucial to winterize your travel trailer properly. Winterizing your RV is not just a mere chore; it’s a vital task to protect its plumbing, electrical, and propane systems from harsh winter conditions.
Luckily, RV manufacturers have made the process of winterizing simpler, especially in modern rigs. So, why spend hundreds of dollars to hire someone else when you can easily do it yourself in just a few hours with essential tools you probably already have?
In this guide, I will cover all aspects of winterizing your camper, from draining water systems and insulating pipes to safeguarding the exterior from freezing temperatures. I will also delve into topics like choosing the right antifreeze, covering tires, and storing your camper in a secure location.
These seven simple steps to winterize your travel trailer will ensure your RV remains in optimal condition during the colder months.
Table of Contents
- 1 Preparations Before Winterizing Your Camper
- 2 How to Winterize a Travel Trailer in 7 Easy Steps
- 2.1 Step 1: Clean and Inspect the Travel Trailer
- 2.2 Step 2: Disconnect the Batteries and Solar Panels
- 2.3 Step 3: Drain and Clean Waste Water Tanks
- 2.4 Step 4: Drain Fresh Water Tank and Water Lines
- 2.5 Step 5: Drain the Water Heater
- 2.6 Step 6: Prevent Pipes from Freezing
- 2.7 Step 7: Store Your Travel Trailer Properly
- 3 Choosing the Right Antifreeze for Winterizing Your Camper
- 4 Final Words
Preparations Before Winterizing Your Camper
Before you begin the winterization process for your travel trailer, it’s essential to make the necessary preparations to ensure a smooth and effective winterization. Taking these steps will help safeguard your trailer and make the winterization process more efficient.
Here are the essential steps to take before winterizing your camper trailer:
Gather the Supplies and Equipment Needed
- RV Antifreeze: Purchase enough non-toxic RV antifreeze to protect all the water lines and plumbing fixtures in your travel trailer.
- Water Pump Converter Kit: Invest in a water pump converter kit, which allows you to pump antifreeze directly into the water lines.
- Basic Tools: Gather tools like screwdrivers, pliers, anode rods, air compressors, and a socket set for any adjustments or repairs during the process.
- Cleaning Supplies: Ensure you have cleaning supplies to tidy up the interior and exterior of your travel trailer before storage.
- Tire Covers: Acquire tire covers to protect the tires from UV rays and harsh weather during storage.
Choose the Right Location for Storing your Travel Trailer
Choosing the right location for winter storage is crucial to protect your travel trailer from harsh weather and potential damage. Here are some considerations for finding the ideal storage location:
- Covered Storage Facility: Opt for a covered storage facility, such as an indoor garage or warehouse, to shield your travel trailer from snow, rain, and UV rays. Covered storage helps prevent direct exposure to the elements, reducing the risk of weather-related damage and fading of exterior surfaces.
- Climate-Controlled Storage: If available, consider a climate-controlled storage facility that maintains a steady temperature throughout winter. Climate-controlled storage protects your trailer from extreme temperature fluctuations, which can be detrimental to sensitive components and materials.
- Secure and Gated Facility: Choose a storage facility with robust security measures, such as gated access, surveillance cameras, and onsite staff. A secure facility minimizes the risk of theft, vandalism, and unauthorized access to your travel trailer.
- Proximity to Home: Opt for a storage facility conveniently located near your home, making it easier for you to access the trailer when needed. Proximity reduces travel time and costs, making it more convenient for pre-season preparations and post-winter checks.
- Long-Term Storage Options: If you plan on storing your travel trailer for an extended period, inquire about discounted rates for long-term storage contracts. Long-term storage options can be cost-effective and offer added peace of mind during the off-season.
- Availability of Amenities: Look for storage facilities that offer amenities like electrical hookups or water access for minor maintenance and preparations during storage. These amenities can be beneficial if you need to perform occasional checks or charge the batteries.
- Reputation and Reviews: Research the reputation of the storage facility by checking online reviews and asking for recommendations from fellow RV owners. Choose a reputable facility with positive feedback and a track record of secure and reliable storage services.
- Size and Accessibility: Ensure the storage facility can accommodate your travel trailer’s size, including any slide-outs or awnings. Confirm that there is enough space for easy maneuvering and accessibility within the storage area.
- Pricing and Terms: Compare pricing and contract terms among different storage facilities to find one that suits your budget and needs. Some facilities may offer discounts for long-term storage or upfront payment.
By carefully considering these factors, you can choose the ideal storage location for your travel trailer, providing peace of mind and protecting your travel trailer during the winter months. Remember, proper storage sets the stage for a hassle-free winterization process and ensures your travel trailer is ready for new adventures when warmer
How to Winterize a Travel Trailer in 7 Easy Steps

Step 1: Clean and Inspect the Travel Trailer
Before storing your travel trailer for the winter, give it a thorough cleaning inside and out. A clean RV not only prepares you for the next season but also helps keep unwanted pests away.
Be sure to remove any excess clothing, bedding, and all food items to deter moths and rodents.
Keep a close eye out for signs of mold, especially if you’ve been in humid climates. Even small traces of mold can escalate into a significant issue if left unchecked.
Focus on cleaning and drying the refrigerator entirely, and consider placing an open box of baking soda inside to absorb any lingering moisture.
If you live in a humid climate, using a moisture absorber can also prevent mold growth.
While cleaning, take the opportunity to inspect your RV thoroughly. Check the roof for cracks in seals or weather stripping, and examine slides and awnings for cleanliness and damage.
Address any issues you find promptly, as winter is an ideal time to have your RV serviced.
Step 2: Disconnect the Batteries and Solar Panels
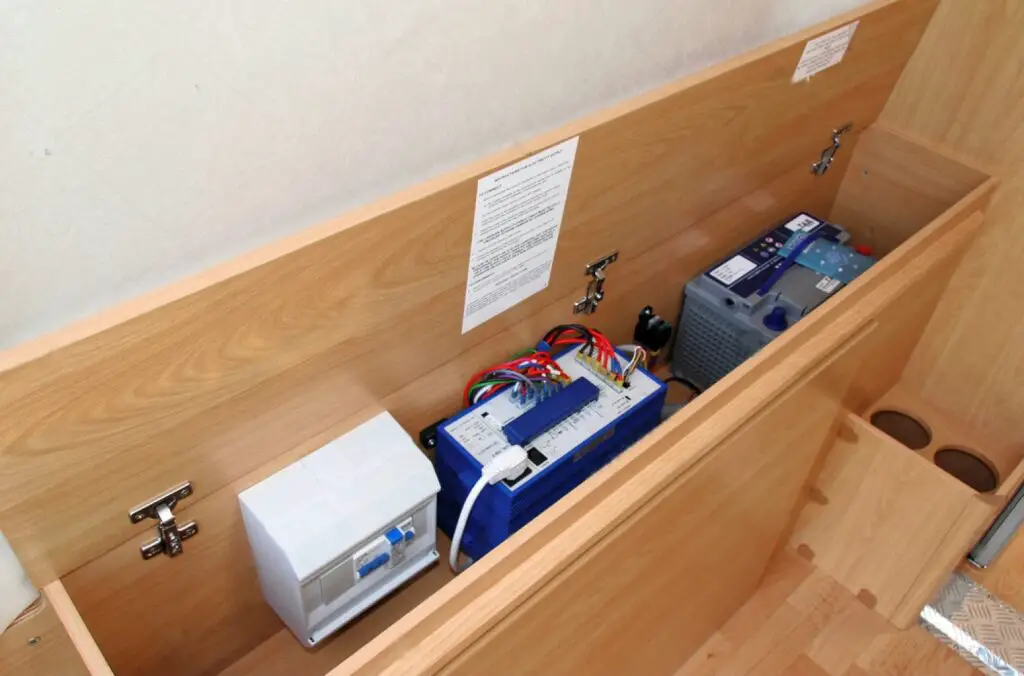
To protect your batteries from draining to 0% charge, ensure they are disconnected or removed during storage. Most RVs come equipped with battery disconnect switches, enabling you to easily cut off power from the batteries.
However, you can manually unhook the battery cables if your RV lacks this feature.
If you store your RV in an area with freezing temperatures, consider removing and storing the batteries indoors. Lithium batteries require less maintenance and can sit for months without consequences.
However, lead-acid batteries need cleaning with baking soda and water to remove corrosion before storage. Avoid using or charging batteries below 30 °F.
For RVs with solar panels, disconnect them from the system to avoid any potential electrical hazards during storage. Also, turn off your propane tanks in case of a leak during the winter.
Step 3: Drain and Clean Waste Water Tanks
Before storing your travel trailer, it’s essential to drain and clean the wastewater tanks thoroughly.
Perform a thorough dump, and if you have a black tank flush system, let it run until the water runs clear through the waste hose.
If you don’t have a black tank flush, try using a hose down the toilet to help dislodge any debris.
Some RVers prefer dumping a bag of ice down the toilet and driving around a bit to help break up any remaining waste on the tank walls.
Whatever method you choose, ensure the tanks are as clean and empty as possible to prevent mold growth during storage.
Step 4: Drain Fresh Water Tank and Water Lines
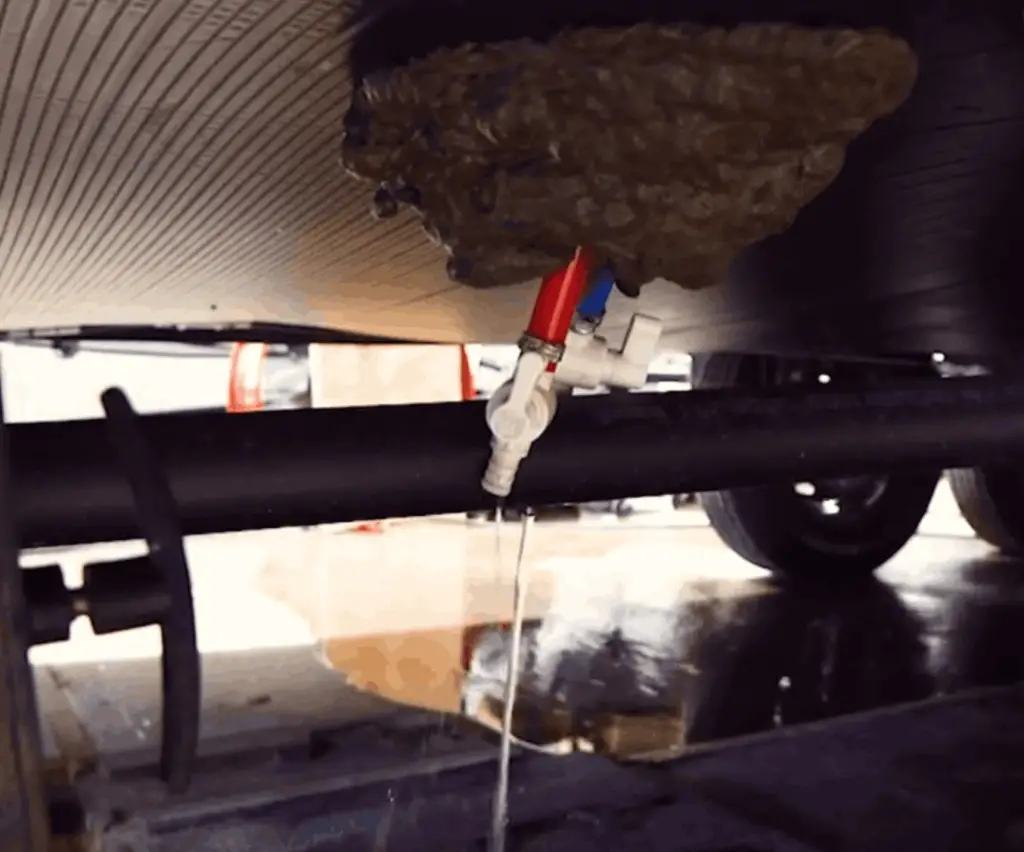
Most travel trailers and 5th wheels have low-point valves located underneath the rig. These valves include hot and cold water lines and the freshwater tank.
Before opening the valves, turn off the water pump and open all faucets to release pressure in the lines.
Place a bucket underneath the first low point valve to catch the water and then proceed to drain all three lines (two hot and cold water lines, one fresh water tank line).
Be mindful of your fresh water tank’s capacity, as it may hold more water than your bucket can handle.
Step 5: Drain the Water Heater
After emptying the water tank and lines, now go on and drain the water heater. Access the water heater through an exterior panel and locate the large bolt, usually with an anode rod attached. Unscrew the bolt and allow the water to drain into a bucket.
Once the water has stopped flowing, replace the bolt and close the access panel. This is also an excellent time to inspect and replace the anode rod if necessary. We recommend this anode rod on Amazon.
Step 6: Prevent Pipes from Freezing

To safeguard your plumbing system from freezing temperatures, you have two ways to do it effectively: Blowing out the water lines and pumping in RV antifreeze into the pipes.
Note: Both strategies are effective, so choose the one that best suits your needs.
Method 1: Blow Out the Water Lines
- Using an air compressor, attach it to your city water hookup with this Hose Faucet Blow Out Adapter.
- Adjust the air compressor to a maximum of 30 psi to avoid damaging the water lines.
- Open all the faucets, including outdoor ones, and turn on the air compressor. The water should flow out, leaving the pipes dry and protected from freezing.
- Remember to add RV antifreeze to each drain to prevent the freezing of valves and seals.
Method 2: Pump in Antifreeze
- To pump in RV antifreeze, use an RV Antifreeze Hand Pump Kit and four gallons of RV antifreeze. Close all faucets and drain valves before starting.
- Attach the hand pump to your city water hookup with the other end of the hose in the RV antifreeze.
- Open one faucet at a time, starting with the hot side, and pump antifreeze until you see the bright pink liquid coming through.
- Repeat this process for all faucets, shower, outside faucets, and the toilet.
- Just like method 1, add about 4 cups of RV antifreeze down each drain, including the toilet bowl.
*Note: If you choose method 2, thoroughly rinse the water lines before using it again.
Step 7: Store Your Travel Trailer Properly
Finally, finding a suitable storage spot for your travel trailer during the winter is essential to protect it from snow and ice-related damage. Opt for covered storage to protect your RV from snow and ice that can cause damage to rubber roofs and seals.
Alternatively, consider investing in a travel trailer cover to provide extra protection if outdoor storage is the only option.
Ensure your trailer is slightly off-level front to back and side to side to allow water, ice, and snow to flow off the sides. Avoid putting stabilizers down, as they can create a ramp for rodents to enter.
If your storage spot is on grass, place wooden planks under the wheels and leveling jacks to prevent sinking into the mud when the snow melts.
Make use of RV tire covers, and a tongue jack cover to protect against the elements.
Choosing the Right Antifreeze for Winterizing Your Camper
Choosing the right antifreeze for winterizing your travel trailer is essential to ensure the proper protection of its plumbing system during freezing temperatures.
Here are some key factors to consider when selecting the appropriate antifreeze:
RV-Safe Antifreeze
Always choose RV-specific antifreeze designed specifically for the plumbing systems of travel trailers and motorhomes. Regular automotive antifreeze contains harmful chemicals that can damage the RV’s pipes and fixtures.
Non-Toxic and Propylene Glycol-Based
Look for antifreeze that is non-toxic and based on propylene glycol rather than ethylene glycol. Propylene glycol is safer for humans, pets, and the environment, making it the preferred choice for RV applications.
Freeze Protection
Check the label to ensure the antifreeze provides sufficient freeze protection for the lowest temperatures in your area. Most RV antifreeze solutions protect against temperatures as low as -50 °F (-46 °C).
Corrosion Inhibitors
High-quality RV antifreeze contains corrosion inhibitors that help protect the metal components of the plumbing system from rust and corrosion during storage.
Pink Color
RV antifreeze is typically pink in color, making it easily distinguishable from other types of antifreeze. This helps prevent accidental use of the wrong product.
Concentrate or Pre-Diluted
RV antifreeze comes in two forms – concentrated and pre-diluted. Concentrate requires dilution with water before use, offering more flexibility and cost-effectiveness. Pre-diluted antifreeze is ready to use but may be more expensive.
Quantity Needed
Calculate the amount of antifreeze required based on your travel trailer’s plumbing system. If possible, purchase enough antifreeze to ensure you can thoroughly winterize your entire travel trailer.
The exact amount required will depend on the size of your RV’s water system. Larger trailers may need several gallons for thorough winterization. So it’s better to have a little extra rather than running out in the middle of the winterization process
Brand Reputation
Choose antifreeze from reputable brands known for their reliability and effectiveness. Read customer reviews and seek recommendations from fellow RV owners or experts.
Recycling and Disposal
Consider the environmental impact of the antifreeze you choose. Opt for products that can be recycled or safely disposed of after use.
Read Reviews and Recommendations
Before finalizing your purchase, read reviews and seek recommendations from fellow RV owners or experts. Learning from others’ experiences can help you make an informed decision about which brand or type of antifreeze to choose for your specific travel trailer.
Final Words
By now, I hope you have learned how to winterize your travel trailer. With these seven comprehensive steps, you can effectively winterize your camper and ensure it remains in excellent condition during the colder months.
Proper winterization is essential to prevent damage to your plumbing, electrical systems, and propane components. As this would save you from potentially costly repairs and ensure your RV is ready for your next travel adventure when spring arrives.
While each travel trailer and fifth wheel may have slight variations, the fundamental process remains the same. However, always consult your owner’s manual for any unique aspects specific to your rig.
