
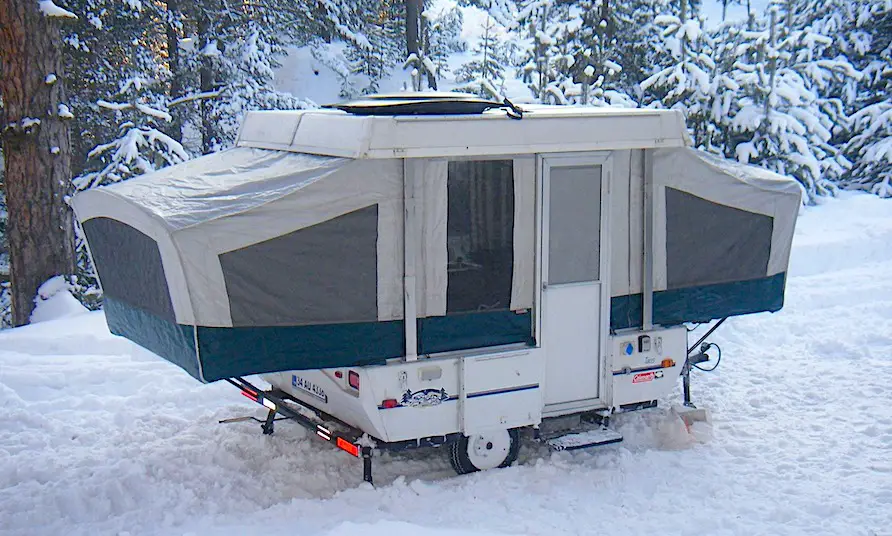
Winterizing your pop-up camper might be one of the first things on your mind when winter approaches. Fortunately, pop-up camper winterization does not involve many complicated steps, unlike a regular RV or trailer.
Pop-up campers are easy to move around, but you’ll also love how quickly you can prepare them for the winter. Here, I’ll show you every crucial detail you need to aid you in learning how to winterize a pop-up camper as winter approaches.
Let’s dive right in!
Table of Contents
What to do before you begin winterizing a pop-up camper
Gather your supplies
Before you winterize your pop-up camper, ensure everything you need is within arm’s length. Depending on the type of pop-up camper you have, you will need:
- Repair Tape Fabric
- RV Water Pump
- RV/ Pop-up Camper Antifreeze
- Cleaning supplies
- Antifreeze hand pump kit
- Caulking for air leaks
- Pliers
- Bucket
- Towels
- Funnel
- Wrench
Check the manual
Check the camper’s manual for any instructions on maintenance. Although you might need help finding specific information to winterize your pop-up camper. So, familiarize yourself with the manual to help you figure out what works for your pop-up camper.
Besides, you might have read the manual at the onset before using your pop-up camper. But then you want to read at the moment to reboot your memory.
How to winterize a pop-up camper in an easy step-by-step guide
Step 1: Drain the water system
The first thing you should do before you start the winterizing process is to drain all water out of your pop-up camper water tanks. This includes both the freshwater tank and the ‘hot’ water heater.
To drain is super important because any water you leave in the pop-up camper can freeze and expand. And when the pipes are not large enough to handle such expansion, it causes them to burst.
You should also hook up air to the city water inlet by blowing air through the faucet. This helps you remove all water droplets.
Remember, even a tiny amount of water might damage your tank. Also, note that some pop-up camper models require bypassing the heater during winterization. Consult your manual for specific steps.
Step 2: Pump in the Antifreeze:
Now, pour antifreeze into your pop-up camper’s water tanker by unhooking the suction of the hand pump and connecting it to the antifreeze. You need to pump until you can see the antifreeze in the sink and be sure that it’s gone all the way through the pipes.
Next, you need to pump antifreeze through the city water inlet. But first, as an optional step, you should consider blowing out any remaining water connecting the air hose to the city water inlet and opening low-point drains. Be careful not to over-pressurize the system.
After that, you can connect the hand pump to the city water inlet, open the faucet, and begin pumping antifreeze through the pipes using a separate hand pump. You’ll also need to pour a cup of antifreeze on each sink and shower drain.
Once you are done, you can connect everything back together. Also, remember to clean the sink, as antifreeze can stain.
Step 3: Protect Other Systems
Now, you need to protect other systems. Here are the steps you’ll take:
- Toilet: Empty toilet and add antifreeze to the holding tank according to the manufacturer’s instructions. You should also drain the shower hose too. Leave the drain valve open.
- Water heater: Turn off the water heater altogether.
- Furnace: cover intake/exhaust vents
- Pies and drains: Pour a small amount of antifreeze into each P-trap under sinks and the shower drain.
- Battery: Remove and store the battery indoors on a battery tender to maintain charge.
- Propane tanks: Remove propane tanks if possible and store them securely. If left on, close the valves tightly.
- Plumbing systems: Reinforce plumbing with PVC pipes. This helps reduce the risks of expanding or freezing pipelines in winter.
Learn how to winterize a travel trailer.
Maintenance tips after pop-up camper winterization
Winterizing your pop-up camper is one of many things you should do before storing your camper for the winter. Like most people, this is also a time to perform maintenance to ensure you return to meet your camper working at its best.
So here are steps you can take to maintain your pop-up camper:
- Carefully clean your camper from the top to the bottom. Pay special attention to the canvas and its roof.
- Check the roof of your camper for any holes and seal where necessary. Buy a strong and durable adhesive tape designed for pop-up campers.
- Wash and dry all interior and exterior surfaces to prevent mold growth.
- Clean every appliance within your pop-up. You should leave the refrigerator door blocked and open. This will enhance airflow and prevent mold growth.
- Get rid of all food items from your pop-up camper. You should also take with you anything that can explode or rust.
- Lubricate the lift system and all moving parts, including the bed slides, hitches, and locks. This helps to keep every mechanism functioning smoothly.
- Repackage the wheel bearings.
- Check tires and apply protectant to them.
- Check the breaks.
Additional tips for winter camping in a pop-up camper
While some people prefer to store their pop-up campers in winter, others prefer to go on an adventure during winter. But then, even as you could use a pop-up camper in winter, heating might still be a problem.
Pop-up campers are designed for something other than camping during winter as compared to an RV or trailer. Their ability to fold up and shrink when traveling is also the downside, as their body material does not hold heat quickly.
Still, here are some tips that can keep you warm and comfortable in winter camping in a pop-up camper:
- Pack plenty of warm clothes and duvet. Note that no matter what you do to heat your pop-up camper, it will never be as warm as an RV. So staying with him means plenty of clothes. It also helps if there’s furnace failure and you’re strained by weather for days.
- Finally, always have the contact information of emergency crews for special situations, such as your pop-up camper getting stuck in the snow.
- Switch for a composting toilet. This helps reduce your carbon and stops your pipes from freezing due to damage to waste lines.
- Also, carefully and methodically review your pop-up camper to find and seal against leaks.
- You’ll also need plenty of supplies, which includes ice scraper and windshield fluids.
How to store pop-up camper in winter
How you store your pop-up camper in winter is very crucial. It’s essential to store it in an ideal way that maintains the efficiency of your RV.
Here are great tips that can help you store your pop-up camper in winter:
- Seal all holes in your pop-up camper, mainly the underside, where animals can get in.
- As I said earlier, you need to remove the battery of your pop-up camper and store it inside your home. But then, remember that you must keep it charged during winter.
- Cover every open vent across your ‘hot’ water heater, refrigerator, or furnace.
- Choose a well-ventilated, dry location from direct sunlight and harsh weather to store your pop-up camper. Get a breathable pop-up camper cover to help safeguard your camper from weather elements.
- Consider adding a water pressure regulator to the plumbing system to protect during storage.
- You can leave vents and cabinet doors slightly open to improve air circulation.
- Lower the tongue end of your pop-up RV to as low as possible. This will help snow and rain roll off quickly.
- Prop your camper’s wheel on blocks if you’re parking on the ground. This ensures they don’t sink into the mud when the ground thaws after winter.
- Check on your camper periodically throughout the winter to ensure proper storage conditions.
Final Words
Winterizing your pop-up camper ensures your camper will continue working at optimum performance long after the winter. Failure to adequately prepare your camper for the harsh winter conditions can lead to mold growth, extensive repairs, and many more.
Follow these steps to ensure your pop-up camper is adequately winterized and ready to hit the road again when spring arrives. Did you learn how to winterize your pop-up camper using this guide? Please let me know in the comment section.
